 By Owen Palmer
A do it yourself carpet cleaner, meaning a home-use machine you run yourself rather than a professional service, can lift embedded dirt, pet odors and traffic grime from carpet when it is set up and operated correctly. This guide walks you through choosing the right method, preparing the room, running the machine in passes and finishing the job so the carpet dries fast and stays clean longer. Along the way you will find a checklist, a comparison table and the mistakes that most often leave carpet soggy, sticky or dingy.
Choose the Right Cleaning Method First
Not every carpet should be treated the same way. Before you fill a tank, decide which method suits your carpet, your schedule and how much moisture you can safely put into it. Most home owners end up choosing between two approaches: a hot water extraction machine, which injects heated cleaning solution and pulls it back out, and a dry or low-moisture system, which uses compounds that are worked in and then vacuumed away.
Shopping for one? See our guide: 10 Best Rug Carpet Cleaner Rental Options Compared for Home Use.
Hot water extraction
This is the classic deep-clean method. A portable extractor sprays a measured amount of warm solution into the pile, agitates it with brushes and then suctions most of the liquid and loosened soil into a recovery tank. It removes the most soil and residue of any home approach, but it also puts the most water into the backing. Manufacturers generally recommend keeping the carpet and pad from staying wet for more than about 24 hours to reduce the risk of mildew.
Low-moisture and dry cleaning
Low-moisture systems apply a small volume of cleaning compound, brush it in and let it dry before vacuuming up the residue. These are better for carpets that are sensitive to water, for rooms you need back in use quickly, or for light maintenance between full deep cleans. They do not pull out as much deep-seated dirt as hot extraction, so expectations should be adjusted accordingly.
Choosing between them
| Factor | Hot water extraction | Low-moisture / dry |
|---|---|---|
| Soil removal | Strongest, including deep grime | Good for surface and light soil |
| Moisture in carpet | Higher; needs solid airflow to dry | Minimal |
| Drying time | Often several hours or overnight | Typically short |
| Best for | Heavy traffic, pet areas, annual deep cleans | Quick refreshes, water-sensitive carpet |
Prepare the Room and Carpet
Preparation accounts for a surprising share of the final result. Dirt you do not remove before wetting the carpet will often turn into mud that the machine simply pushes deeper. Plan for about 30 to 45 minutes of prep for an average room.
- Move furniture off the carpet, or at least lift the legs with coasters or blocks so no piece sits in cleaning solution.
- Vacuum thoroughly with a good upright or canister vacuum, working in two directions across the pile. Grit left behind can scratch fibers as the brushes turn.
- Pre-treat visible stains. Use a spot cleaner designed for carpet, test it on a hidden corner first and let it dwell as directed.
- Check the carpet label or fiber type. Wool, silk and some natural fibers need pH-neutral or fiber-specific solutions.
- Open windows and turn on fans or a dehumidifier so the room can dry as quickly as possible.
Checklist before you start
- Fresh, clean water for the tank (warm, not boiling; check your machine’s guidance)
- Cleaning solution matched to the machine and carpet type
- Spot cleaner and a clean white cloth for stubborn marks
- Old towels to protect door thresholds and baseboards from splashes
- Fans or a dehumidifier, and a plan for keeping foot traffic off the carpet
Run the Machine Correctly
Good technique matters more than brute force. Work methodically, and remember that the machine needs time to do its job.
Step 1: Fill and check the machine
Fill the clean water tank to the marked line and add the recommended amount of solution. Adding too much soap is one of the most common causes of sticky carpet, because residue attracts new dirt. Check that the recovery tank is empty and the filter is in place.
Step 2: Start at the far corner
Begin in the corner farthest from the exit so you do not walk over freshly cleaned carpet. Work in strips about the width of the machine head, usually around 6 to 10 inches of overlap between passes.
Step 3: Use forward and reverse passes
Press the spray trigger as you push the machine forward, then release it and pull back over the same area with the trigger off to extract. This pass-and-suck pattern removes more liquid than letting it sit. Move at a steady pace. Rushing leaves the carpet wet, and dwelling in one place can soak the backing.
Step 4: Make a second pass if needed
For heavily soiled areas, go over them once more with clean water only, without solution. This rinse pass removes leftover detergent and helps the carpet feel soft rather than tacky.
Step 5: Dry the carpet properly
Drying is where many home jobs go wrong. Run fans aimed across the carpet, keep the room closed to humidity for the first few hours and avoid walking on the damp surface. Lift a corner of an area rug or dark towel to check the backing. If it still feels cold or damp to the touch after several hours, keep the airflow going.
Common Mistakes to Avoid
- Using too much solution. More soap does not clean better. It leaves film that makes carpet re-soil faster.
- Skipping the pre-vacuum. Loose grit gets ground into fibers during extraction.
- Soaking one spot. Holding the trigger in a single place can oversaturate the pad and cause odor or browning.
- Using hot water on every carpet. Some synthetic and wool fibers respond poorly to high heat. Check the manufacturer’s instructions.
- Mixing cleaning products. Combining chemicals can create harmful fumes and reduce cleaning power.
- Neglecting the machine. A clogged filter, dirty brush roll or old solution in the tank weakens every job.
Tips for Better Results
- Clean high-traffic paths and pet zones more often than rarely used rooms.
- Empty and rinse the recovery tank after every session, not just when it is full.
- Let the machine heat fully before you start if it has a heater, since cold water removes less oil-based soil.
- Test a hidden spot first with any new solution to check for color change.
- Keep a log of when you last cleaned each room so you can plan around the carpet’s dry time.
Recommended gear
A few items can make home carpet cleaning noticeably more effective and less frustrating.
- A portable hot water extractor. The core tool for deep cleaning. Look for a model with adjustable solution flow and a strong suction motor so the carpet dries faster. View on Amazon
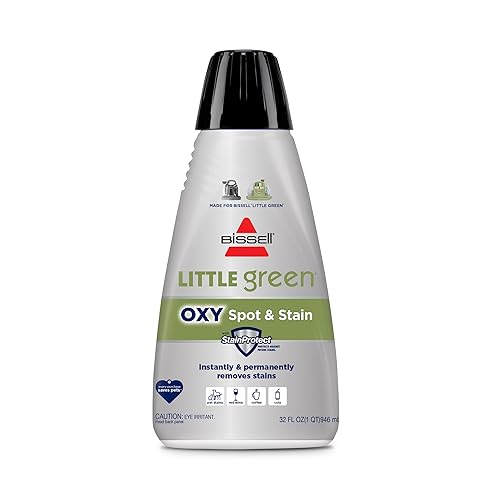
- Carpet-safe spot cleaner. Useful for pre-treating stains before the main pass and for quick touch-ups between full cleans. View on Amazon
- Portable fan or air mover. Speeds drying and reduces the chance of musty odor developing in the backing. View on Amazon
- Replacement brush and filter kit. Keeps the machine performing well over time, since worn brushes and clogged filters reduce both cleaning and suction. View on Amazon
For guidance on picking a machine that fits your home, see How to Choose a Carpet Cleaner for Your Home. If you have a small area, Portable Spot Cleaner vs Full-Size Carpet Cleaner explains when a compact model is the better fit. Pet owners may want to compare options in 9 Best Carpet Cleaner Pet Options for Homes With Dogs and Cats (2026), and anyone considering a low-moisture approach should read Dry Cleaner for Carpet: How to Clean Carpet Without Soaking It.
FAQ
How often should I clean carpet with a do it yourself carpet cleaner?
Most households do well with a deep clean every 12 to 18 months, and more often in high-traffic areas or homes with pets. Spot cleaning between sessions helps extend the time between full cleans.
How long does carpet take to dry after cleaning?
Drying time depends on humidity, airflow and how much water was used. Many carpets feel dry within 6 to 12 hours with good ventilation, though thick pads may take longer. Manufacturers generally advise keeping traffic off the carpet until it is fully dry.
Can I use vinegar or baking soda in my machine?
Check your machine’s manual first. Many manufacturers advise against homemade mixtures because they can leave residue or damage components. Use solutions specifically made for carpet extractors.
Why does my carpet feel sticky after cleaning?
Sticky carpet usually means too much detergent was left behind. Run a clean-water rinse pass and extract thoroughly. Using less solution next time will help prevent it.
Is it safe to use a carpet cleaner on wool carpet?
Wool needs gentle handling and a pH-appropriate solution. Test a hidden area first, use lower heat if your machine allows it and avoid over-wetting. If you are unsure, consult a professional carpet cleaner or the carpet manufacturer before proceeding.
What should I do if a stain does not come out?
Pre-treat with a carpet-safe spot cleaner, let it dwell, then blot rather than rub. Some stains, especially old dye or pet urine that has reached the pad, may need professional treatment.
Do I need to vacuum before and after cleaning?
Yes. Vacuuming before removes grit that would otherwise be ground into the fibers. Vacuuming after the carpet is fully dry lifts any loosened fibers and leaves a neater finish.
Can I clean carpet on stairs with a home machine?
You can, but work carefully. Use a light touch, clean one step at a time, and keep the stairs usable with a plan for drying so no one slips on damp treads.
Conclusion
A do it yourself carpet cleaner can give you deep, satisfying results when you match the method to your carpet, prepare the room properly and work in controlled passes. Keep moisture under control, dry the carpet thoroughly and maintain the machine so it performs well every time. With steady habits, your carpets will look fresher and last longer between professional cleanings or none at all.
Related reading
Ready to choose one?
About Owen Palmer
Owen Palmer is part of our editorial team and reviews and edits our non-vacuum cleaning gear guides, checking product details against manufacturer specifications and owner feedback.







Write Your Review
No reviews yet. Be the first to share your experience!